


What is it?
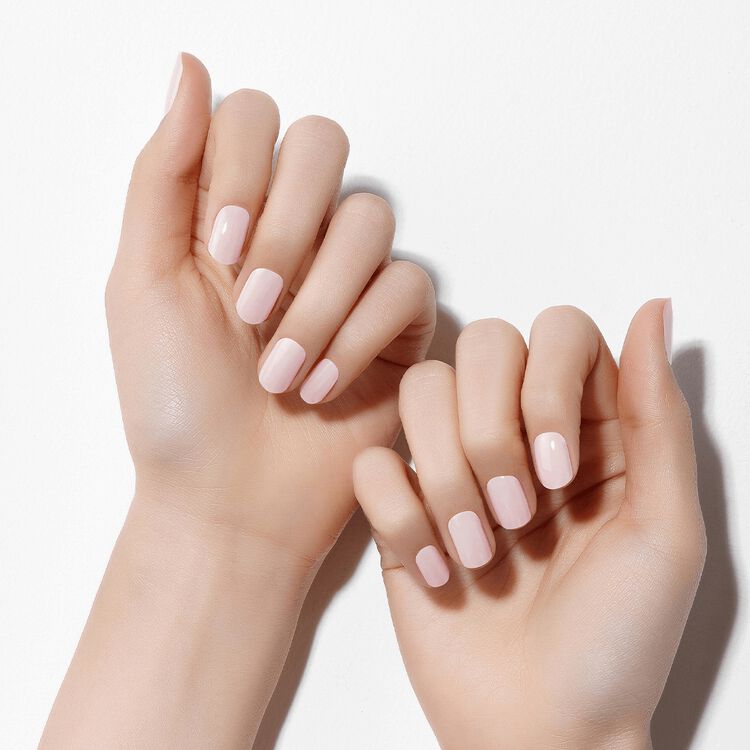
A complete starter kit to achieve the pro-finish and sculpted effect of a salon gel manicure at home with ease. GLAZE innovation is a semi-cured gel strip delivering salon results: molded shape, mega volume, and mirror shine that's gel strong for up to 14 days.
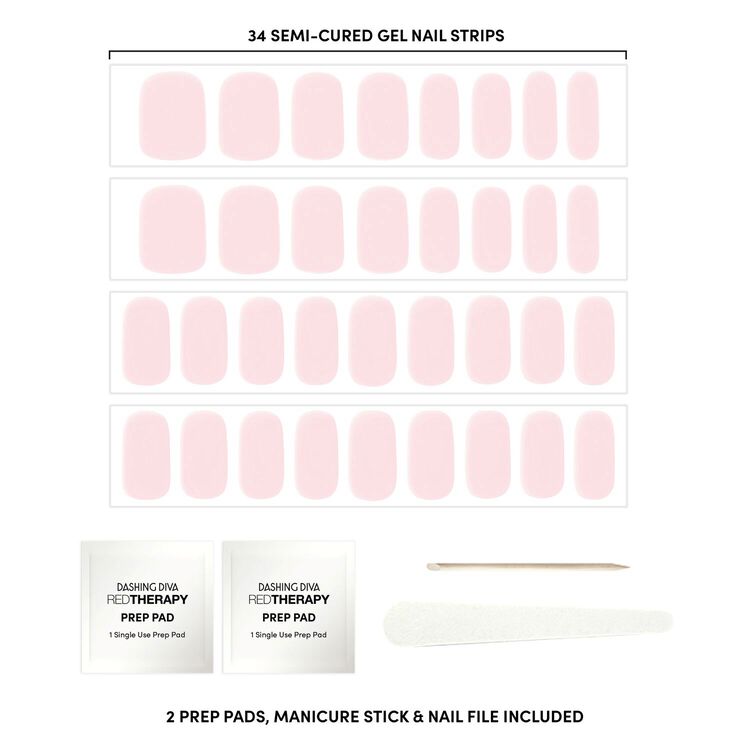
Includes: Mini LED Lamp, 34 semi-cured gel nail strips (in 12 sizes), Nail file, Manicure stick, and 2 prep pads at a valued price.
GLAZE Semi-cured Gel Nail Strips achieve a professional salon gel manicure at home in just 45 seconds. These all-in-one nail strips are designed with a base coat, color coat, and topcoat; A triple-layer technology that flawlessly masks ridges and nail imperfections. GLAZE has the flexibility to sculpt to the curve of your nail bed and harden under an LED light, creating mega volume and a mirror shine that's gel strong for up to 14 days.
GLAZE is cruelty-free, vegan, and free of the top 10 harmful chemicals found in most nail products.
What makes it special?
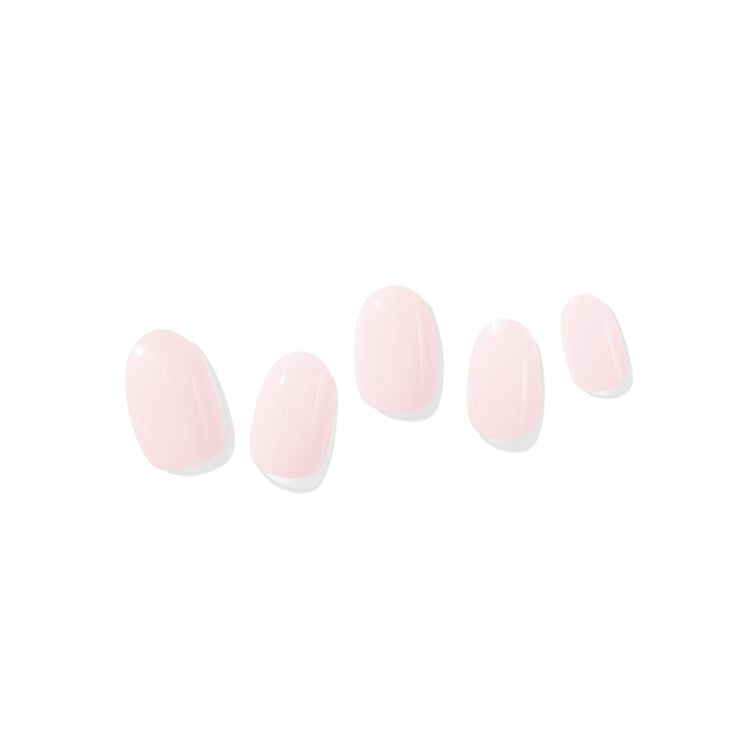
- Molded shape: Curved volume is molded to nail shape, it's thicker in the center and thinner at the cuticle for superior fit our proprietary DOME EFFECT™
- Gel strong up to 14 days: Lasting shine, durable wear that's chip-proof and scratch-proof.
- Mirror shine: Rich vibrant color with light reflecting particles delivers brilliant shine.
- Mega volume: Plump volume that masks imperfections for an even pro-finish.
- Ergonomic design for manicure and pedicure use
- Powered by a USB cable, connect to any device
- Easy application: Fool-proof, fast curing formula
- Mini LED Lamp: compact, portable & powerful
- Compatible with all gel nail products
- Two settings: 45 or 60 seconds
Acrylates Copolymer, Polyurethane-11, Dipentaerythrityl Pentaacrylate, Acrylates Crosspolymer, Polyester-5, Synthetic Fluorophlogopite, Polyethylene Terephthalate, Polyurethane-33, Aluminum Hydroxide, Tin Oxide. MAY CONTAIN: Chromium Oxide Green, Iron Oxides, Red 36, Manganese Violent, Blue 1 Lake, Titanium Dioxide, Aluminum Powder.
PREP PAD: Isopropyl Alcohol, Water/Aqua/Eau
How To Use:
STEP 1: PREP
•Wash hands with soap and water.
• Shape nails and push back cuticles.
• Use enclosed Prep Pad to ensure nails are clear from oils and residue.
• Make sure your nails are completely dry before application.
Pro Tip: Because GLAZE is an all-in-one product, no additional Base Coat or Nail Strengthener is needed.
STEP 2: SELECT SIZE
• Hold the sheet over nail to find your size. If you are in between sizes, always size down.
STEP 3: REMOVE FILM
• Remove the protective film.
STEP 4: APPLY
• Gently lift strip from sheet starting from edge.
• Place strip over the center of your nail, starting at cuticle line and pressing outward. For optimal adhesion, the strip should be placed above the cuticle line avoiding skin or cuticles.
STEP 5: PRESS
• Press down firmly from center and side to side.
STEP 6: TRIM
• Trim strip flush to your nails using nail scissors or nail clippers.
STEP 7: CURE
• Press the button at the back of the lamp
• First insert four fingers under the lamp and cure. Next insert thumb and cure separately.
• Cure under LED light for 45 seconds.
Pro Tip: To activate two-timer function quickly push button for 45 second cure. For a 60 second cure, hold down button for 3 seconds.
STEP 8: FILE
• Position the nail file horizontally along the contour of your nail. With one sweeping motion, file firmly across your free edge. Make sure GLAZE does not exceed beyond your nail length. Any overhang will cause chipping or cracking.
Pro Tip: Using the wooden manicure stick gently press down on glaze strip thoroughly to seal all edges before curing. This will prevent hair and debris from catching onto the nail strip perimeter.
How To Remove:
STEP 1: REMOVE
• Apply cuticle oil on nail bed.
STEP 2: LIFT
• Use manicure stick to gently and slowly lift nail strip from corner of the cuticle area.
• Gradually push the strip off your nail. CAUTION: Do not peel off with force or in one quick motion.