


Cat eye nails are the kind of manicure that makes people look twice. With a swipe of magnetic polish and a quick hover of a magnet, you get a luminous, shifting line that moves in the light, almost like velvet or a gemstone. The best part? You don't need a salon appointment to make it happen.
If you've been seeing cat eye nail designs all over your feed and wondering how they work, you are in the right place. We are breaking down exactly what cat eye nails are, how magnetic polish creates that dimensional effect and how to do them at home step by step. Whether you are new to nail art or ready to level up your mani game, this look is easier than it looks and satisfying to master.
In this article
-
Article tl;dr
-
What is cat eye nail polish?
-
How does the cat eye magnet work?
-
What you need to start your cat eye manicure
-
How to create cat eye nails: A step-by-step guide
-
Cat eye nail art designs to enhance your manicure
-
Popular cat eye nail colors
-
Cat eye nails with regular polish vs. gel
-
Why your cat eye nails aren't working and how to fix them
-
Expert tips for a stronger cat eye effect
-
Try the cat eye look yourself
-
Cat eye nail FAQs
Article
- Cat eye nails use magnetic polish to create a light-shifting, dimensional stripe or glow.
- The effect is created by holding a magnet over wet magnetic polish to move metallic particles.
- Working one nail at a time helps create a sharper, more defined beam.
- Dark base colors create stronger contrast, while lighter shades give a softer glow.
- Popular designs include classic vertical, diagonal swipe, velvet effect, halo and French tip cat eye.
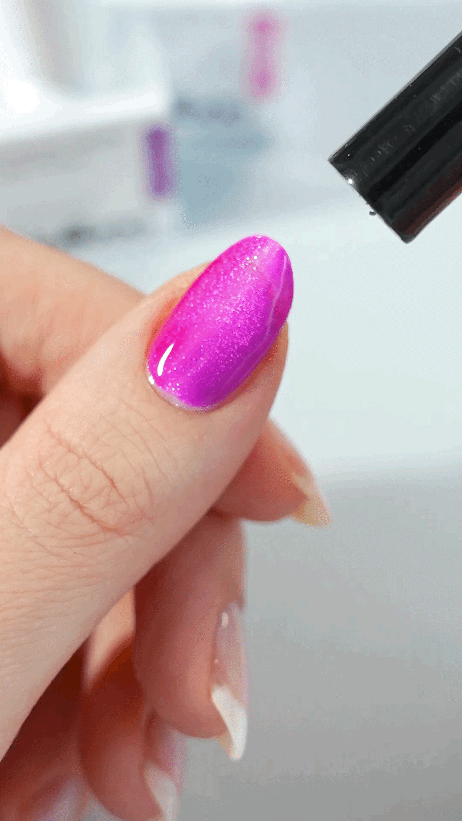
What is cat eye nail polish?
Cat eye nail polish is a specialty gel formula designed to create a reflective, light-shifting effect that looks almost dimensional on nails. Instead of flat shimmer or glitter, cat eye polish creates a concentrated beam of light that moves as your hands catch different angles.
What makes it unique is the finish. The look can appear silky, velvety, or even gemstone-like depending on the color and design you create. From deep emerald and sapphire tones to soft neutrals with a subtle glow, cat eye nails give you high-impact shine without needing advanced nail art skills.

"I love adding sheer magnetic or cat-eye effects for a subtle, modern look. It taps into a minimalist trend that still feels elevated."
– Juli Russell, Sally Beauty Expert
It is a statement manicure that still feels wearable, which is why it has become a go-to trend for both everyday glam and special occasions.
How does the cat eye magnet work?
The cat eye effect happens because the polish contains magnetic pigments that can be repositioned before the polish sets. When the polish is freshly applied, those pigments are suspended in the formula and free to move.
By hovering a magnet close to the nail, you guide those particles into a specific formation. The closer and steadier the magnet, the sharper and more defined the effect will be. Once the design looks the way you want, you seal it in by curing gel polish under a lamp.
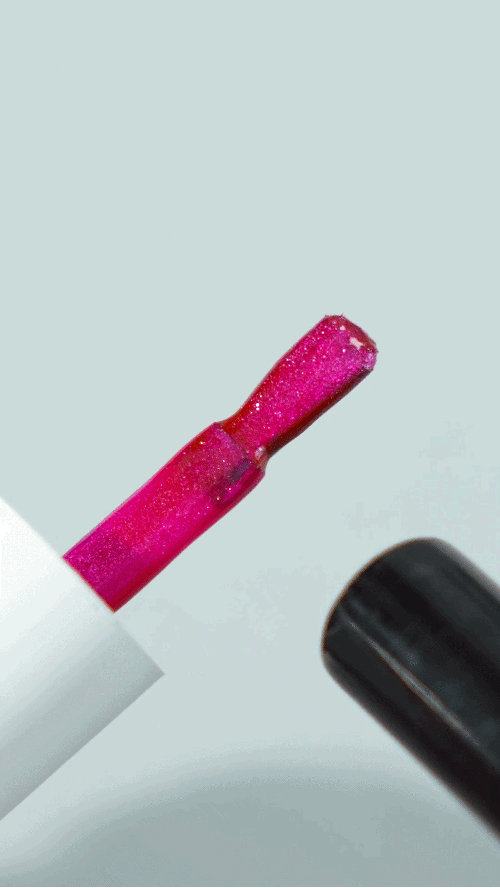
What you need to start your cat eye manicure
Creating cat eye nails at home is easier than it looks, especially when you have the right tools. A few key essentials will help you get a crisp magnetic effect and long-lasting shine.
Here is what you'll need:
- Magnetic cat eye nail polish in your chosen shade
- If you are using gel magnetic polish, you will also need a LED or UV lamp to cure each layer
- Cat eye magnet tool to create the design
- Base coat to protect your natural nails and improve wear
- Top coat for shine and durability
- Nail file and buffer to shape and smooth the nail surface
- Cuticle pusher for clean prep
How to create cat eye nails: A step-by-step guide
Cat eye nails may look intricate, but the technique is simple once you understand the timing. Work one nail at a time for the most defined effect, especially if you are using gel.
Step 1: Prep your nails
Start with clean, dry nails. Remove any old polish, then shape your nails with a file and lightly buff the surface to remove shine. Gently push back your cuticles for a clean edge.
Apply a thin layer of base coat and let it dry completely, or cure if you are using gel.
Step 2: Apply the magnetic polish
Apply a thin, even coat of your cat eye polish. For deeper color and a more dramatic effect, you can apply a second coat after the first layer dries or cures, or apply a base color of black first and then the cat eye nail polish.
If you are using gel, do not cure the layer yet. The polish needs to stay wet so the magnetic particles can move when you hold the magnet over it.
Step 3: Create the cat eye effect with the magnet
Activate the magnetic pigments before shifting them into place. To do this, wave the magnet down each side of your nail in a square-like shape, keeping it close to the nail without touching it. This alternates the direction of the magnetic pigments and pulls them evenly to the surface, making it easier to maneuver them into the pattern you want.
You will see the shimmer shift and gather into a defined beam. Position the magnet straight for a classic vertical stripe, tilt it for a diagonal effect, or experiment around the edges for a softer, velvet-inspired finish.
Once you are happy with the design, cure the gel polish under your lamp to lock in the look.
Step 4: Seal the look
Finish with a glossy top coat to enhance shine and protect the design. Be sure to cap the free edge of your nail to help prevent chipping.
Allow a regular polish top coat to fully dry, or cure the gel top coat according to the manufacturer's instructions. After that, your cat eye manicure is ready to catch the light from every angle.
Expert Tip
Keep your hand steady and rest it on a flat surface. Hold the magnet in place for five to ten seconds to prevent the design from blurring.
Cat eye nail art designs to enhance your manicure
Once you master the basic technique, cat eye nails become incredibly versatile. Small changes in magnet placement can completely transform the look, giving you everything from subtle shimmer to bold, high-contrast dimension. Try these design variations to switch things up:
| Design Style | How to Position the Magnet | Overall Effect | Best For |
|---|---|---|---|
| Classic Vertical | Hold the magnet straight over the center of the nail | Sharp, defined light beam | Bold jewel tones and dramatic looks |
| Diagonal Swipe | Tilt the magnet at an angle across the nail | Modern, angled streak | Longer nail shapes and trend-forward sets |
| Velvet Effect | Move the magnet around the edges evenly | Soft, diffused glow | Neutral shades and everyday wear |
| Halo or Aura | Hold the magnet around the perimeter of the nail | Glowing center highlight | Metallics and statement manicures |
| French Tip Cat Eye | Apply magnet over the tip only | Dimensional shimmer at the edge | Elevated twists on classic French nails |
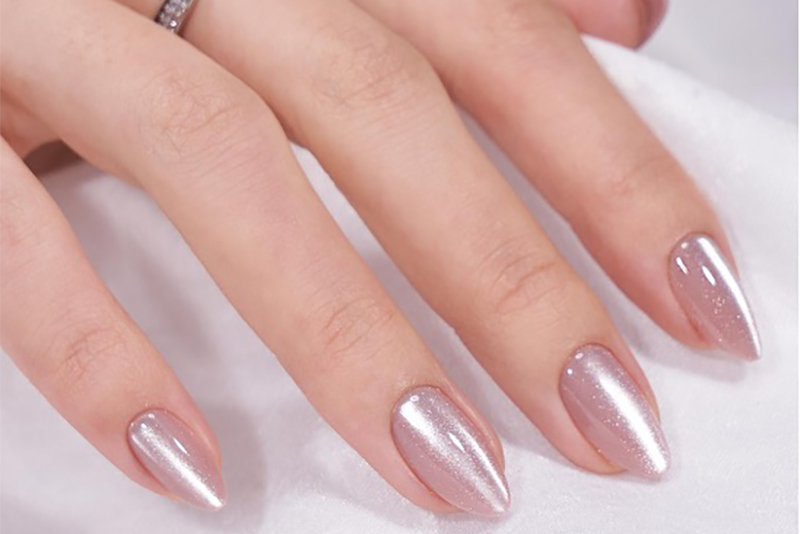
Classic vertical cat eye
This is the signature look that made cat eye nails famous. Hold the magnet straight over the center of the nail to create a defined vertical beam of light.
It is sleek, dramatic and perfect for darker shades like emerald, navy or plum. The vertical line elongates the nail and delivers that high-impact, light-catching finish.
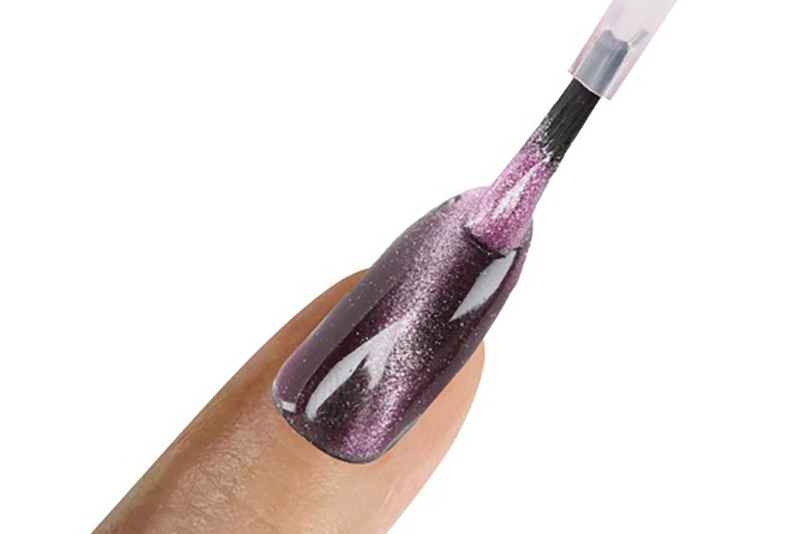
Diagonal swipe
For a more dynamic effect, tilt the magnet at an angle to create a diagonal streak across the nail. This variation feels modern and slightly edgy while still being wearable.
It works especially well on longer nail shapes where the diagonal line has more space to stretch across the surface.
Velvet cat eye effect
The velvet effect creates a soft, diffused glow that looks almost plush in the light. Instead of forming a sharp stripe, move the magnet around the edges of the nail to pull the shimmer inward evenly.
The result is a smooth, all-over sheen that shifts as you move your hands. It is subtle but still dimensional, making it perfect for neutral or everyday shades.
Halo or aura cat eye
For a glowing center effect, position the magnet around the perimeter of the nail. This pulls the shimmer toward the middle and creates a soft halo.
This design feels elevated and eye-catching, especially in jewel tones or metallic finishes. It is a great option if you want something different from the traditional stripe.
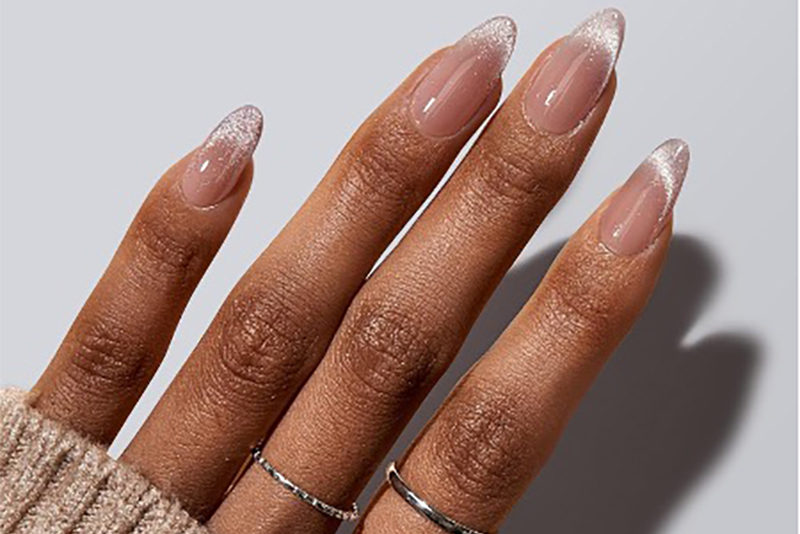
French tip cat eye
Put a twist on a classic French manicure by using magnetic polish just on the tips. After applying your base color, add cat eye polish to the tip and use the magnet to create a defined beam or soft shimmer across the edge.
Popular cat eye nail colors
The shade you choose can completely change the mood of your manicure. Darker tones create bold contrast and dramatic light beams, while softer shades deliver a more diffused glow. Use this guide to find your perfect match.
| Color Family | Overall Vibe | Effect Intensity | Best For |
|---|---|---|---|
| Emerald, Sapphire, Ruby, Garnet | Bold, luxe, high-impact | Very defined beam | Nights out, statement looks |
| Black, Charcoal, Deep Plum, Teal | Dramatic, sleek | Maximum contrast | Classic glam, fall and winter |
| Taupe, Mocha, Mauve, Copper | Polished, wearable | Soft to medium definition | Everyday wear, office-friendly |
| Rose Gold, Champagne, Pink Quartz, Iridescent | Elegant, luminous | Medium shimmer glow | Weddings, events, elevated glam |
| Blush, Lavender, Baby Blue, Moonstone, Silver | Playful, fresh | Subtle light shift | Spring and summer looks |
| Multi-Chrome, Holographic | Futuristic, eye-catching | Dynamic color movement | Trend lovers, creative sets |
Cat eye nails with regular polish vs. gel — what's the difference?
No matter which formula you choose, the technique stays the same. Apply the polish, create the magnetic effect, then seal the look for a manicure that shifts beautifully in the light.
Gel magnetic polish
Gel magnetic polish stays workable until you cure it under a LED or UV lamp. That means you have more time to position the magnet and perfect your design before locking it in.
Once cured and finished with a gel top coat, cat eye gel nails can last up to two to three weeks with a high-gloss, salon-level finish. They are more resistant to chips and daily wear, which makes them ideal for vacations, events, or busy schedules.
Removal requires soaking with acetone, so proper prep and aftercare are important to keep your natural nails healthy.
Why your cat eye nails aren't working and how to fix them
If your cat eye effect looks blurry, faint, or just not as dramatic as you expected, you are not alone. The technique is simple, but small timing or positioning mistakes can change the final result. The good news is that most issues are easy to fix.
Using the magnet too far away
The magnet needs to be close enough and strong in order to actually move the particles. If it is hovering too high above the nail, the shimmer will barely shift.
Fix it:
Hold the magnet just above the surface without touching the polish. The closer it is, the sharper and more defined the beam will look. If you are still not getting the results you're looking for, you may need a stronger magnet.
Waiting too long before using the magnet
Magnetic polish needs to be manipulated while it is still wet. If you wait too long, the particles will not move as easily.
Fix it:
Apply the polish and immediately use the magnet. Work one nail at a time to keep full control of the effect.
Applying the polish too thin
If the coat is too sheer, the magnetic stripe will not appear bold or dimensional.
Fix it:
Apply an even, slightly richer coat. If needed, add a second layer and magnetize again before sealing.
Not sealing the design properly
If you drag the top coat brush too firmly over the design, it can soften the magnetic effect, especially when working with non-gel nail lacquer.
Fix it:
Float the top coat gently over the nail instead of pressing down. This helps preserve the crisp line and keeps the shimmer in place.
Curing too soon or too late with gel
If you cure gel polish before perfecting the magnetic design, you lock in a look you may not love. If you wait too long, the particles may start to settle.
Fix it:
Adjust the magnet until you are happy with the effect, then cure immediately to freeze the design.
Expert tips for a stronger cat eye effect
Want your cat eye nails to look bold, sharp and ultra-dimensional? These simple adjustments can elevate your results instantly.
- Work one nail at a time. Magnetic polish needs to be manipulated while it is still wet. Paint, magnetize, then move on to the next nail for the most defined effect.
- Hold the magnet closer than you think. Hover it just above the nail without touching the polish. The closer the magnet, the sharper and brighter the beam will appear.
- Use a darker base for more contrast. Layering cat eye polish over black or a deep tone can make the magnetic stripe stand out dramatically.
- Keep your hand steady. Rest your hand on a flat surface and hold the magnet in place for five to ten seconds to prevent blurring.
- Apply an even coat. Too thin and the effect looks faint. Too thick and it can pool. Aim for a smooth, balanced layer.
- Float your top coat. Apply it gently without pressing the brush into the nail so you do not disturb the magnetic design.
With the right products, timing and technique, cat eye nails are completely achievable at home. As Juli Russell, Sally Beauty Expert, says, "You don't need constant salon visits to have beautiful nails. With the right products, techniques and a little practice, you can achieve salon-quality results at home."
Try the cat eye look yourself
Cat eye nails prove that statement nail art does not have to mean complicated steps or salon appointments. With magnetic polish, the right tools and a little practice, you can create a dimensional, light-shifting manicure that looks professional and feels completely achievable at home.
Whether you choose a bold jewel tone with a sharp vertical beam or a soft velvet glow in a neutral shade, this trend is all about experimenting and making it your own. Take your time with the magnet, play with different angles, and build confidence with each set.
When you are ready to get started, find everything you need at Sally Beauty, from magnetic cat eye polishes and magnet tools to base coats and top coats and all the essential nail supplies. With the right products in your kit, your next salon-quality manicure is just a few steps away.
Cat eye nail FAQs
What's the best base color for cat eye nails?
Dark base colors typically create the most dramatic cat eye effect. Black, deep navy, plum, and emerald enhance contrast and make the magnetic beam appear sharper and more defined. If you prefer a softer look, you can use a neutral or similar-toned base to create a more diffused glow. The stronger the contrast between the base and magnetic shimmer, the more intense the final effect will be.
Can you do cat eye on dip nails?
Yes, but the magnetic effect comes from magnetic polish, not dip powder. To achieve a cat eye look over dip nails, apply a magnetic gel polish on top of your cured dip base, then use the magnet before curing.
How long do cat eye nails usually last?
Gel magnetic polish can last up to two to three weeks when applied and cured correctly. Proper nail prep, thin even layers and sealing the free edge help extend wear.
Are cat eye nails difficult for beginners?
Not at all. The magnet does most of the work for you. The key is timing and holding the magnet steady while the polish is still wet.
Can I use a regular magnet for cat eye nails?
It is best to use a magnet specifically designed for cat eye polish. These magnets are shaped to help create clean lines and specific patterns.
Do you need a UV or LED light for cat eye nails?
You only need a lamp if you are using gel magnetic polish. Gel formulas must be cured under an LED or UV lamp to set the design.
Can you fix cat eye nails after curing?
If you are using gel and have already cured the polish, the magnetic design is locked in. To change it, you would need to file off the layer and reapply.

