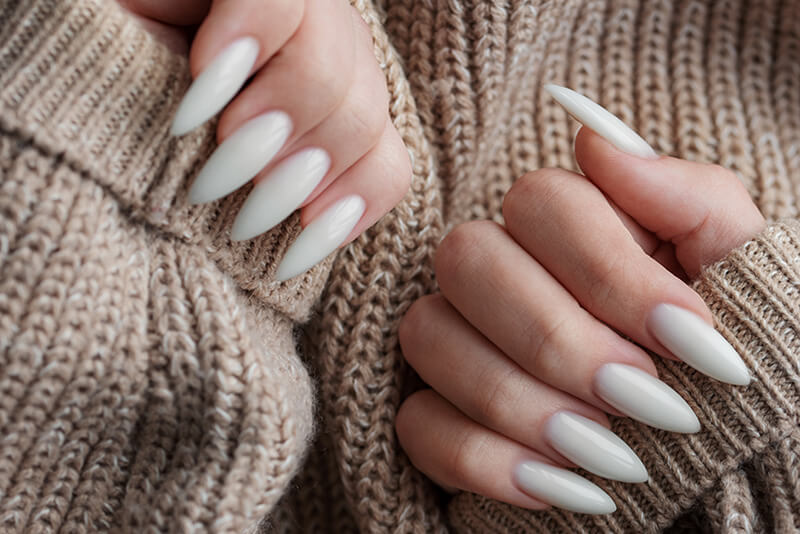
What are Glazed Donut Nails?
The Glazed Donut nail trend is a viral nail look that has several variations. The concept of the look is to have a neutral nail color topped with a light chrome powder to create the ‘Glazed Donut’ effect. There are many ways to achieve the Glazed Donut concept, instead of chrome powder as a nail topper, you can have any light colored glitter or shimmer nail polish of your choice.
Since the trend has become so popular, there has been a few variations that are made to look great on everyone. The original Glazed Donut look includes a white or neutral colored base coat followed by a shimmer layer of your choice. One new variation style is the Chocolate Glazed Donut look which includes a neutral color brown, once again followed by a chrome or shimmer color. Another design in the Glazed Donut family includes the Strawberry Glazed Donut nails, this look can be achieved by using any darker pink color as your base coat, followed by the iconic chrome or glitter to finalize the glaze effect.
What do you need to get Glazed Donut Nails?
Typically the Glazed Donut nail is created by using a neutral base coat and a glitter or chrome top coat to finish the overall look. To get this look you will need a clear base coat, a neutral pink, white or brown color that will be used as the first layer which will be followed by any type of glitter, shimmer or chrome top coat of your choice. You can’t forget your clear top coat to seal in your finalized design and make it last perfectly for several days.
Products Needed to Get the Glazed Donut Nail Look :
Base coat -
Any clear base coat you already have will do but in case you don’t, we recommend Beauty Secrets Moisturizing Base Coat.Neutral Color Nail Polish -
You’ll want to use a thin layer of light pink, light brown, or white as your first coat.A sheer Nail Polish for the Second Coat -
To really nail (pun intended) this look you’ll need either a glitter, shimmer, pearl, or any other opaque nail polish color preferably with a pink, white, or brown hue. The key is to make sure the color you select is very sheer. You can also achieve this by using a very thin layer of chrome powder. Browse our assortment of sheer and shimmery shades for this look.Top Coat -
Once you’ve perfected your masterpiece, make sure to seal it in with a top coat. Once again, any top coat you already have will do but we recommend Seche Vite Dry Fast Top Coat.
Pro Tip: Using a nail polish color that has a white pearl effect will give you the most accurate look to the glaze on top of a donut. We recommend any of these 3 pearly shades from NAILS.INC that can be used on top of any base color of your choice.
Since there are so many variations of this look, the main concept is to have the elegant natural nail look with a second coat that pops for the glittery glazed effect. It does not matter what base color you choose as long as you finish the look with a shimmer top coat. For the top coat, feel free to use a sheer glitter polish or you can decide to have the complete glazed look by finishing your nail base with a chrome powder and sealing everything with a clear top coat. The look is known to be more natural so using more opaque and lighter neutral shades will give you the typical Glazed Donut look.
How to do Glazed Donut Nails Step by Step
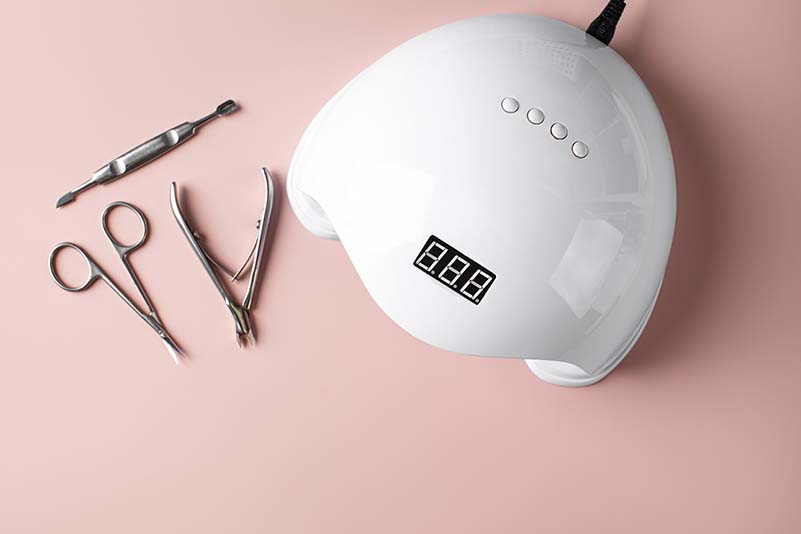
Even though you are creating a new nail look, don’t forget to prep your nails so your look will remain fresh and last longer. You will always need to use your basic nail care products to ensure your nails are refreshed and prepped for a new look
Step 1. Nail Prep
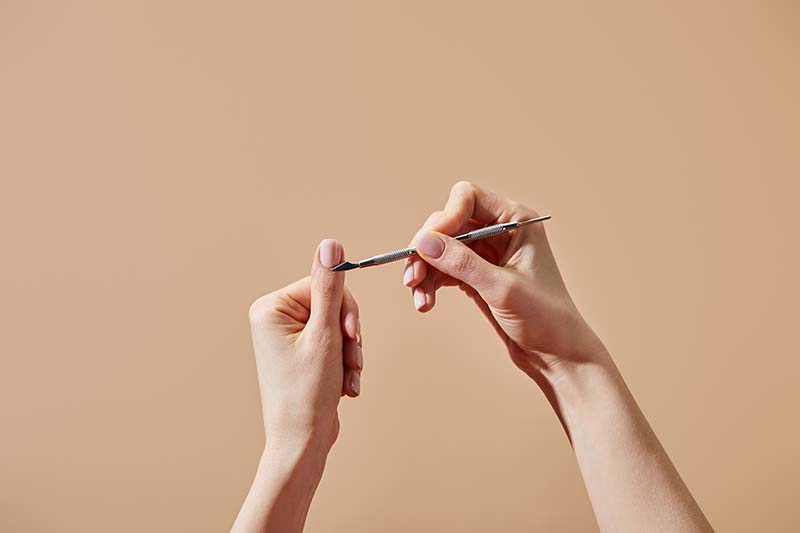
- Some key steps into having healthy and prepared nails is initially pushing back your cuticles and removing any additional skin that might be in the way. If you don’t already have the tools, we recommend this mani starter kit .
- Always buff your nails to ensure there are no uneven ridges that will cause a bumpy surface for you to begin with.
- Clean under and around your nails with a cuticle scraper to fully get rid of any extra dust or debris that is laying in your nail bed. For more uniform nails, you must file your nails to have smooth edges and to achieve a more cohesive shape with each nail.
- Finally, you will apply a base coat once your nails are prepped and you are ready to begin the process of getting the Glazed Donut look.
Step 2. First Coat of Nail Polish – Neutral Base Color
This is where you apply your first layer of nail polish. You’ll want to apply an even but thin layer of the white, pink, or brown shade you selected. Only apply one coat!
Step 3. Second Coat of Nail Polish – Opaque Shimmer Color
Contrary to the way you typically paint your nails, you will not go in with your first color as the second coat. This is where you’ll use your sheer, shimmer, or glitter polish you picked. This is what really makes this look come to life.
Step 4. Top Coat
You’ve prepped, used a base coat, painted 2 coats of different color and now it’s time to make your hard work last. Use a top coat to seal in the color and complete the look.
3 Ways to Achieve Glazed Donut Nails with ASP, Morgan Taylor, or Gelish Products
Now that you know a little bit more about the legendary nail trend, let’s explore a few ways on how you can achieve this look on your own.