

Gel manicures are known for their glossy finish and long-lasting wear, but when it’s time to take them off, things can get tricky. If you’ve ever been tempted to peel or pick at your gel polish, you’re not alone. That quick fix can leave your nails feeling thin, dry, and damaged.
The good news is you don’t need a salon visit to remove gel the right way. With the proper tools, a little patience, and a few pro-approved techniques, you can safely remove gel nail polish at home while keeping your natural nails healthy and strong. Whether you’re new to DIY nail care or just looking for a better method, we’re breaking down the easiest ways to take off gel, plus how to care for your nails after.
In this article
-
Article key takeaways
-
What makes gel nail polish different?
-
Gel nail removal supplies
-
Method 1: Soak-off gel removal
-
Method 2: Use a gel polish remover
-
Method 3: Warm acetone soak
-
Method 4: Gel removal with foil or nail clips
-
What to do if gel won’t come off
-
Post removal treatments
-
Mistakes to avoid when removing gel nails
-
Pro tips for easier gel removal next time
-
Gel nail polish removal FAQs
Article key takeaways
- Always remove gel polish using a soak-off method to protect your natural nails
- Filing the top coat is essential for breaking down gel effectively
- 100% acetone is the most reliable way to remove gel at home
- Never peel or pick off gel polish, as it can cause thinning and damage
- If gel is not lifting easily, re-soak instead of forcing removal
- Nail clips offer a cleaner, reusable alternative to foil wraps
- Hydration and aftercare are key to keeping nails healthy post-removal
- Proper application and prep can make your next removal faster and easier

MEET OUR EXPERT
With nearly 15 years in the nail community, Juli Russell has helped DIYers achieve salon-quality results at home. What started during the early YouTube beauty era has grown into a trusted voice for beginners and experienced nail enthusiasts alike.
“It’s always been about making nail care more accessible and empowering people to feel confident doing their own nails,” Juli shares.
When it comes to gel nail polish removal, Juli emphasizes that the right technique matters just as much as the products you use. Taking the time to properly remove gel helps protect the natural nail, prevent damage, and keep nails healthy between manicures.
What makes gel nail polish different?
Gel nail polish is designed to last longer than traditional polish, thanks to its unique formula that cures under a UV or LED lamp. This process creates a hard, glossy finish that resists chips and keeps your manicure looking fresh for weeks.
Because gel polish bonds more tightly to the natural nail, it cannot be removed with regular nail polish remover alone. That same durability is what makes gel so popular, but it also means removal requires a more careful, step-by-step approach to avoid damage.
Why you should never peel off gel polish
Peeling off gel polish might seem quick and satisfying, but it can seriously damage your natural nails. When you pull off the gel, you are often lifting layers of the nail plate along with it, which can lead to thinning, peeling, and breakage over time.
Instead of forcing it off, using the proper removal method helps protect the integrity of your nails and keeps them smooth, strong, and ready for your next set.
Gel nail removal supplies
Before you start, having the right tools on hand makes the process smoother, faster, and much safer for your nails. Using proper supplies helps break down the gel effectively while minimizing damage to your natural nail.
Here’s what you’ll need for at-home gel removal:
- 100% pure acetone (as recommended by Juli Russell)
- Cotton balls or cotton rounds
- Aluminum foil or reusable nail clips
- Nail file (medium grit)
- Cuticle pusher or manicure stick
- Nail buffer
- Cuticle oil
- Hand cream
- Gel Removal products, such as Dashing Diva One Gel Remover or Mini Mani Moo Gel No More
Method 1: Soak-off gel removal
The soak-off method is a great way to remove gel nail polish at home. It breaks down the gel safely so you can lift it away without damaging your natural nails. Taking your time with each step is key to getting the best results.
Step 1: Gently file the top coat
Start by lightly filing the shiny top layer of your gel polish. This helps remove the seal so the acetone can penetrate and break down the product more effectively. Focus on removing the shine, not filing down to your natural nail.
As nail expert Juli Russell explains, “Damage comes from improper removal. If you rip off gel or over-file the nail, you’re pulling layers of keratin from the nail plate.”
Taking a gentle approach here is key. Filing too aggressively can weaken the nail before you even begin the removal process, so use light pressure and stop once the surface is no longer glossy.
Step 2: Soak cotton with acetone
Saturate a cotton ball or pad with 100% acetone. Make sure it is fully soaked, as this is what will help dissolve the gel polish.
Step 3: Wrap nails with foil or clips
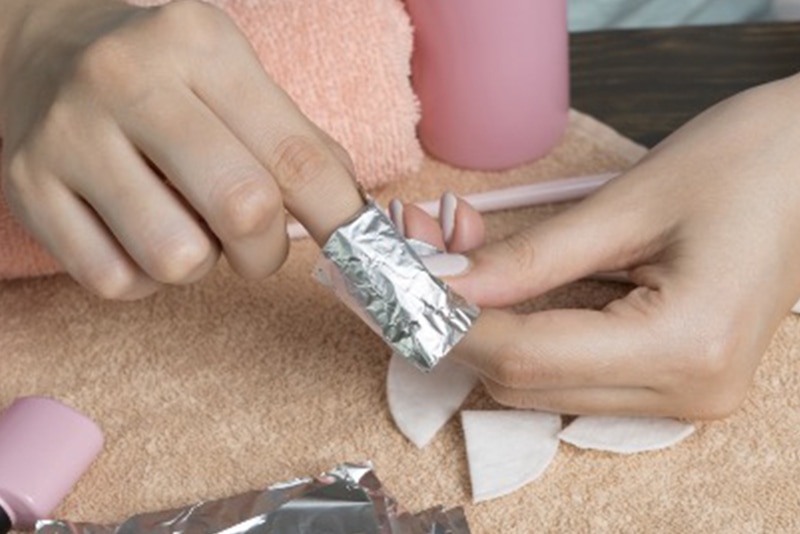
Place the soaked cotton directly on your nail, then wrap it with a small piece of aluminum foil or secure it with a nail clip. This keeps the acetone in place and allows it to work more efficiently.
Step 4: Let it sit (10–15 minutes)
Allow your nails to soak for about 10 to 15 minutes; using warm water may speed up this process. This gives the acetone time to break down the gel so it can be easily removed. Avoid rushing this step, as removing too early can make the process harder.
Step 5: Gently push off the gel
After soaking, remove the wraps and use a cuticle pusher or orangewood stick to gently push off the softened gel. If any polish remains, reapply the acetone and let it soak a bit longer. Never force or scrape aggressively, as this can damage your natural nails.
Method 2: Use a gel polish remover (no soak required)
Mini Mani Moo Gel No More is an acetone free way to remove gel.
How to use Gel No More
- All you have to do is buff your nail bed with a medium-grit file before applying a thick coat of Gel No More. Let it sit for 30 seconds and apply a second coat.
- After 2-3 minutes, the polish will bubble and begin to crack. Gently push off the gel manicure with a cuticle pusher tool or a wooden cuticle stick. You may need to lightly buff the nail afterward with a fine buffing block.
- If you have more than one layer of gel polish, repeat these steps several times or use a bit of acetone to remove the remaining gel polish.
Why we love it
- You can remove gel polish or dip in under 10 minutes
- Many uses from one bottle
- Saves money by not paying for removal at the nail salon
- Next to no damage to natural nails
Method 3: Warm acetone soak
If you want to cut down your removal time, warming the acetone can help speed things up. Heat allows the acetone to break down gel polish more efficiently, making it easier to lift off.
How to do it safely:
- Fill a larger bowl with warm water
- Place a smaller bowl of acetone inside
- Soak your nails in the acetone for 10 to 15 minutes
Never heat acetone directly or use a microwave, as it is highly flammable.
After soaking, the gel should appear lifted or slightly wrinkled. Use a cuticle pusher to gently remove the softened polish. If needed, soak a bit longer rather than forcing any remaining product.
Method 4: Gel removal with foil or nail clips
Nail clips offer a simple, less messy alternative to foil wraps while delivering the same effective results. Instead of wrapping each finger, you can secure acetone-soaked cotton onto your nails using reusable clips.
Why use nail clips
Nail clips are designed to hold cotton firmly in place, helping the acetone stay concentrated on the nail surface. This creates a more consistent soak and reduces dripping or mess during the removal process.
How to use nail clips
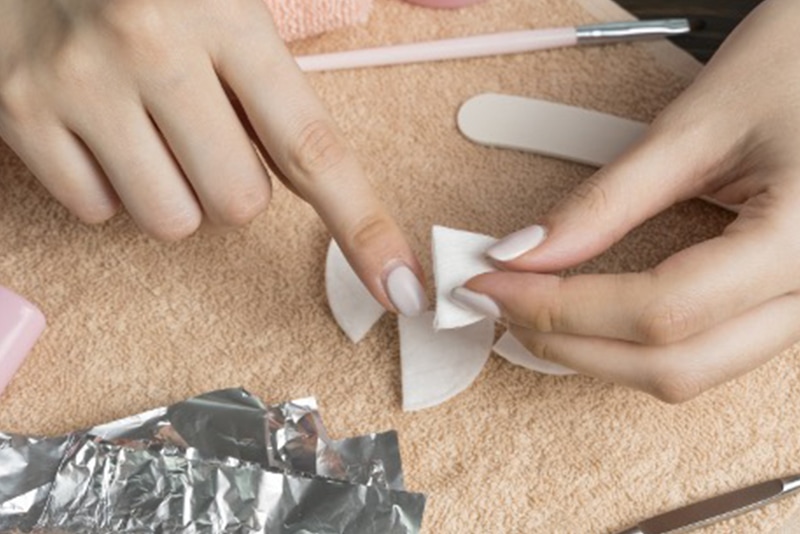
Apply acetone-soaked cotton to each nail, then place a clip over the top to secure it. Let your nails soak for 10 to 15 minutes while the acetone breaks down the gel polish.
Removing the gel
Once the gel has softened, remove the clips and gently push off the polish using a cuticle pusher or orangewood stick. If any product remains, reapply and soak a bit longer.
What to do if gel won’t come off
If your gel polish isn’t lifting easily, don’t force it. Stubborn gel usually means it needs more time to break down, not more pressure.
Start by reapplying acetone and letting your nails soak for a few more minutes. You can also lightly file the surface again to help the acetone penetrate any remaining layers.
If small patches are still sticking, gently work them off with a cuticle pusher, but avoid scraping or digging into the nail. Forcing removal can cause peeling and long-term damage.
Patience is key here. Taking an extra few minutes to re-soak will help protect your natural nails and leave them in much better condition once the gel is fully removed.
Post removal treatments: How to protect and strengthen your nails
After removing gel polish, your nails may feel dry or slightly weakened. Giving them the right care after removal helps restore moisture, improve strength, and keep them looking healthy between sets.
Hydrate with cuticle oil daily
Acetone can strip moisture from both your nails and surrounding skin, so hydration is essential. Apply cuticle oil daily to nourish the nail bed, improve flexibility, and prevent dryness or cracking. Consistent use can make a noticeable difference in how your nails look and feel.
Use a nail strengthener or treatment
If your nails feel thin or fragile, a nail strengthening treatment can help reinforce them. Look for formulas designed to support nail growth and reduce breakage, especially if you regularly wear gel manicures.
Mistakes to avoid when removing gel nails
Removing gel polish at home is simple when done correctly, but a few common mistakes can lead to unnecessary damage.
- Peeling or picking off gel polish instead of soaking
- Skipping the filing step, which makes removal take longer
- Not soaking long enough and trying to rush the process
- Scraping too aggressively with tools
- Over-buffing the natural nail after removal
Pro tips for easier gel removal next time
A few small adjustments during your manicure can make removal much easier later on.
- Apply thinner layers of gel polish to prevent excessive buildup
- Cap the edges properly so the gel wears evenly
- Use a high-quality base coat for better, more controlled removal
- Keep nails and cuticles hydrated between sets
- Avoid over-curing, which can make gel harder to remove
Setting yourself up during application makes the removal process faster, easier, and gentler on your nails.

